


Knife Sharpening Part I By Tom Claycomb III - Today we’ll do an introduction into knife sharpening and cover blade Continue Reading
Succeeding with the Fundamentals: It’s in the Details By Michelle and Chris Cerino - The difference between a good shooter and a great shooter is in the details. Continue Reading
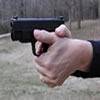
Succeeding with the Fundamentals: Get a Grip By Michelle and Chris Cerino - The primary role of grip is to aid in managing recoil. Continue Reading
In order for anyone to fire a handgun with any degree of accuracy, certain skills must first be addressed, mastered and repeated with consistency. These skills must be combined each and every time the trigger is pulled. These skills will form the foundation, the basics, of shooting.
We will assume, for the purpose of this article, that the shooter is right handed and that the handgun is a semi-automatic, not a revolver, for now.
FIRST SKILL, BODY POSITION:
The movement the handgun makes will be determined by how stable your stance is. You may feel it impossible to hold your sights on the point of aim long enough to get a shot off. Because shooting is new to you, new coordinated reflexes must be learned from scratch. These new reflexes will come about only from patience, lots of dry fire practice, lots of bullets down range, and adherence to these five (5) skills.
You want to face the target, with feet shoulder width apart, body straight (not bent or canted over the handgun). You want a position with both arms out front supporting the handgun, so both support and comfort are essential. Your arms will be slightly bent, not locked totally to the front at the elbow. Your arms, with the elbows as pivots will serve as the shock absorbers from the recoil of the handgun. Try this stance and remember to afford some comfort into it, not standing rigid or tense.
SECOND SKILL, GRIP:
Grip the handgun firmly, placing the web of the right hand as high and forward under the tang (rear grip) as possible. The higher the grip the better. Stability is essential and a loose grip thwarts stability. Too tight a grip invokes shaking, and too loose a grip invites, “ limp wristing,” and a possible handgun malfunction because you are not affording the handgun a firm platform for the action to cycle. The right index finger will not be adding to the grip. It’s only task is to squeeze/pull the trigger when the time comes to do so. The trigger finger should rest straightened alongside the frame of the firearm, outside of the trigger guard until ready to fire. It is not part of the gripping hand, but totally independent. When firing the trigger finger should not touch or rub on the gun anywhere other than the trigger itself. The pad of the finger should be used - not the first joint. This will provide better trigger control. The remaining three fingers of the right hand should grip the handle of the handgun firmly, but not too tight that the finger tips turn red and the hand begins to tremble. Trembling hands cause a change in sight picture and off target shots. Your right hand should represent approximately 40% of your total grip.
Your left (support) hand should wrap around the right hand to cradle/support the handgun with the fingers directly under the trigger guard. Do not place the left index finger in front of the trigger guard. Doing so while firing can result in shots left of target. The left hand is to represent 60% of your total grip. Both thumbs are on the left side of the handgun, not gripping but stable. Both thumbs should be pointing at the target and your arms should be out in front but not locked at the elbows. Most folks place the right thumb close to or touching the slide release button. Any gripping with the thumbs will normally result in pulled shots to the right of the intended target. When you find a grip that works, claim it as your own and stick with it. Remember, changing your grip in the midst of shooting a magazine of ammo will indeed change the strike of the bullet on the target.
THIRD SKILL, BREATH CONTROL:
Proper breath control is essential to accuracy. When ready to fire raise the firearm to your target aiming point, breath in and the let out about half of the breath and then hold it. This will give you the most stable platform to fire from. When you raise the handgun to your target aiming point, and are able to fire without taking-in or giving-up a breath within 5-6 seconds, you have just commenced the third skill, breath control. Breath control actually is an aid to accuracy. Breathing while shooting will move the sights from your optimum aiming point and in reality move your sight picture. If the sight picture is not obtainable within the 5-6 seconds of holding your breath, then place the firearm handgun down to the ready position, breathe and rest your arms before starting with a fresh breath of air. Waiting too long to shoot will increase unsteadiness and add movement to the handgun and will result in a missed bulls eye opportunity.
FOURTH SKILL, SIGHT PICTURE:
What you see is what you want to hit. New shooters should concentrate on the point at the 6 o’clock position of the bulls eye so they can re-aim at the same spot each and every time they fire. The idea here is to develop a group of fired shots on the target regardless of where they hit so long as the re-aiming point is the same. Sight adjustment is made later to allow the groups to hit on the bulls eye only after the new shooter has produced good tight groups. Don't just aim at the target select a very small location on the target and aim at that spot. I use the 6 o’clock position of any bulls eye because I can find that spot each and every time. The target will be slightly blurred, but aiming at the bottom of it ( 6 o’clock ) will allow you to revisit the same spot before each shot. Your eye’s task is to focus on the front sight, with the rear sight and the target slightly blurred. The front sight should fill the middle open area of the rear sight and together they should form a straight line with the bulls eye resting on top of this straight line. While gripping your handgun lets determine your dominate/master eye. Some shooters like to close one eye and shoot and some keep both eyes open. If you settle on closing one eye while shooting remember that either way, be consistent, do not swap back and forth. Aim at something, keeping both eyes open and on the sights. Without moving your head or the handgun, close one eye and see if the sight picture changes. Your dominate eye will remain immediately behind the sights and the non-dominate eye will appear off the sights at an angle.
FIFTH SKILL, TRIGGER PULL/CONTROL:
In practicing the 4 skills mentioned above, the only motion in firing should be the trigger pull. There should be no other movement other than pulling the trigger when firing the handgun, and this pull should be smooth and straight back.
This fifth skill is the most difficult and therefore deserves the lion share of attention. When pulling the trigger, you should use the most sensitive part of your finger, the area between the very tip and the first joint. Insuring the handgun is empty we are going to determine the amount of trigger slack your handgun has before the hammer falls. Slack is any free movement in the trigger just before reaching the last resistance point to the rear of its travel before the hammer falls. Moving the trigger finger past the slack assures that the tolerances in the firing mechanism linkage are taken up and are in firm contact before positive trigger pressure is applied. This careful action is an aid in the positive pressure that will release the hammer quickly and smoothly. In order to fire a controlled shot the shooter must learn to increase the pressure on the trigger positively, smoothly, gradually, and evenly.
Pulling at an angle, even slightly, can change your point of aim prior to firing. If the trigger is not pulled straight to the rear the weight of trigger pull will increase. Trigger finger placement is the key! Dry firing is the best exercise for increasing your accuracy and will allow you to notice any sight deviation without any of the recoil associated with live fire. Practice this over and over, until you can squeeze the trigger without moving your handgun at all. The gripping fingers and the thumb do not move or tighten. Keep the grip pressure constant 60%/40%. You could balance a dime on the top of your handgun just behind the front sight and practice dry firing to determine whether or not you are applying smooth straight back trigger pull pressure. If the dime remains through dry firing, then you must be providing a good stable platform and the correct trigger pull. Some shooters apply consistent trigger pull pressure at a more rapid rate than others. Some apply this pressure slower and more deliberately. The trick to this fifth skill, is to apply pressure to the trigger in such a way that does not change/move your sight picture from your aiming point. If, in doing so, the handgun fires and surprises you, you basically have removed your anticipation of the trigger pull. This method of controlling the trigger action will give the shooter a surprise break of the shot before any muscular reflex can disturb sight alignment. (Anticipation is the shooter’s choice to increase the trigger pressure while engaged in shooting and usually results in the bullet striking the target at the 1 o’clock position. This is also referred to as heeling the shot).
Tips on Lubrication
Let's start with what you shouldn't use - WD40 or anything like it. WD-40 is a fine light duty oil and rust penetrator.
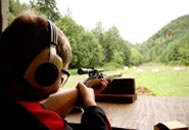
Tips on Headspace
Headspace can be thought of as something like this: The cartridge in your chamber is in a safe with the bolt of the rifle as the door.
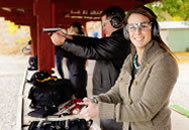
Handgun Tips
Cock the hammer (chamber and magazine empty of course). Without depressing the Grip Safety, pull the trigger. The hammer should NOT...
Copyright © 2015 - All Rights Reserved - Swab-its.com
Swab-its® is a registered trademark of Super Brush LLC
- Disclaimer